Showing posts with label sewing. Show all posts

Monday, September 24, 2012

the one hour reversible wrap skirt


You will need:
about 50cm each of two co-ordinating fabrics (for an average adult, knee length skirt)
2m pre-made cotton tape (or make your own, I show you how)
sewing machine, scissors, thread, tape measure, iron and board
and about 1 hour


To wear, you just step inside the skirt and pull the tape around in front and tie where comfortable.
Open up, twist skirt around and re-tie.  There you have a different skirt!!
This works for a ladies skirt as well as for a little girl. 
Got an hour and some fabric in your stash?  Make a skirt!  It is that easy.


Saturday, April 21, 2012

child safety wrist strap - a tutorial


I don't know about your kids, but mine are the free spirited, adventure seeking, lets explore kind. 
(Read independent & strong willed!!)
That's all well and good in the backyard, in the bush or at the playground. 
Not so good at the shops, walking to school or traversing a car park!!

Events today at the shopping complex, have inspired me to make a couple of wrist straps for my two smallest kids.  Here's how I did it.


Disclaimer :: This is not to be used instead of holding the child's hand. 
It is an additional means of knowing where they are.  
But you knew that already!!

I recommend making as many as you need and keeping them with you, just in case. 
I made two and they will live in my handbag.


Do you have issues with your kids sticking with you when out and about? 
What do you do to balance safety with independence?


Sharing at

Thursday, April 19, 2012

{almost no sew} fabric bunting - a tutorial


****************************


5.  Sew the fabric to the tape in one long zig-zag line.

Hang the bunting up and have a party!!

See, it is almost no sew!  You could have it completed within the hour. 
{ps. You could make it even quicker if you staple the fabric to the twill tape!  Nobody will know!}

Got to love a fast & frugal craft project!!

****************************


How do you decorate for a kids party?


Sharing at

Sunday, March 04, 2012

re-fashioned shirt dress


This is the before shot of the shirt dress I picked up at an op shop for $3.  It fit ok, is a lovely colour and really comfy fabric (cotton/lycra).  It just looks a little bland as is. 


So lets see what I ended up with after one night of unpicking and restitching...

I took the short sleeves off and re-cut them as gathered cap sleeves, took in the fullness under the arms and into the waist and ran a length of elastic around the hem with toggles to finish off.


Here are some close-ups of the details.


I just love it!!  It has added a little something different and is still a great comfy dress to throw on.


Are you into refashioning clothing?  What is your latest project?

Linking to Frugal Days - Sustainable Ways, Thirty Handmade Days, Make, Grow, Thrift,

Thursday, March 01, 2012

coffee cup sleeve


Recently, I have been buying more take away coffees than normal.  Our home espresso maker has (hopefully temporarily) thrown in the towel.  Until I can get around to having it seen to, we are stuck with the french press or take away espresso (and the french press is so tiresome to clean!!)

And I like hot coffee but not holding on the hot coffee cup.

So call it a cuff, holder, cosy or sleeve, this nifty little hot drink thingy will go everywhere with you.  Keep a couple in your hand bag and make some up as quick gift items.  They would be great as teacher appreciation gifts, to give with a gift card to a local coffee shop.


What you will need:  Large scraps of cotton fabric, wool suiting and interfacing, a paper coffee cup and pinking shears.

Take a paper coffee cup and cut it to use as a pattern. 
Remove the base. 
Cut the cup to lay it flat and then trim about 2cm off the top and bottom.
Add 1.5cm to the short sides as seam allowance.


Cut one each of cotton fabric, wool suiting and interfacing.
Sew or iron on the interfacing to the wrong side of the wool piece.
(I sewed the interfacing to the cotton, but would have been heaps better on the wool as it would stabilise the stretchiness)


(Ignore the interfacing on the cotton piece!!)
Fold each piece right sides together and stitch a 1cm seam.


For the rest of the steps I have no pics. 
I was rushing to finish in the last minutes of my littlest ones afternoon nap!! 
I did finish but with no photos taken. 
It is very easy though.

Turn the cotton tube right side out.  Slip the wool tube inside the cotton tube, wrong sides together.  Don't match seams, as the seam area gets too chunky.

Stitch about 1.5cm inside the raw edge around both the top and bottom of the cosie.
Finish the raw edge with pinking shears.

There you have it.  A finished coffee cup sleeve.  It should look something like the one below.


You could easily whip up enough for yourself and some gifts in about an hour.  And use up some of your scrap fabric too!!

What ideas do you have for small handmade gifts?


Linking to Frugal Days - Sustainable Ways 

Wednesday, January 25, 2012

reversible shoulder bag


I can't say I've done much sewing of late (probably, for the last 12months!!), but today I cracked out the machine, found the sewing kit and got to work.

My sister asked me about 2 years ago for a new bag and I did promise I would make her one. 
Better late than never hey?


I made this bag using a pattern by Novita of verypurpleperson.

It is so easy to make.  I did it in about 3.5hrs, most of that time was with 2 preschoolers underfoot.  The pattern printed to scale.  The instructions were easy to follow with lots of pics to get you through the tricky bits. 
I got the pattern cut from two 1m pieces of fabric.  The main fabric is a grey polyester suiting type fabric, with the lining from a Kaffe Fasset piece, both from Mum's stash.
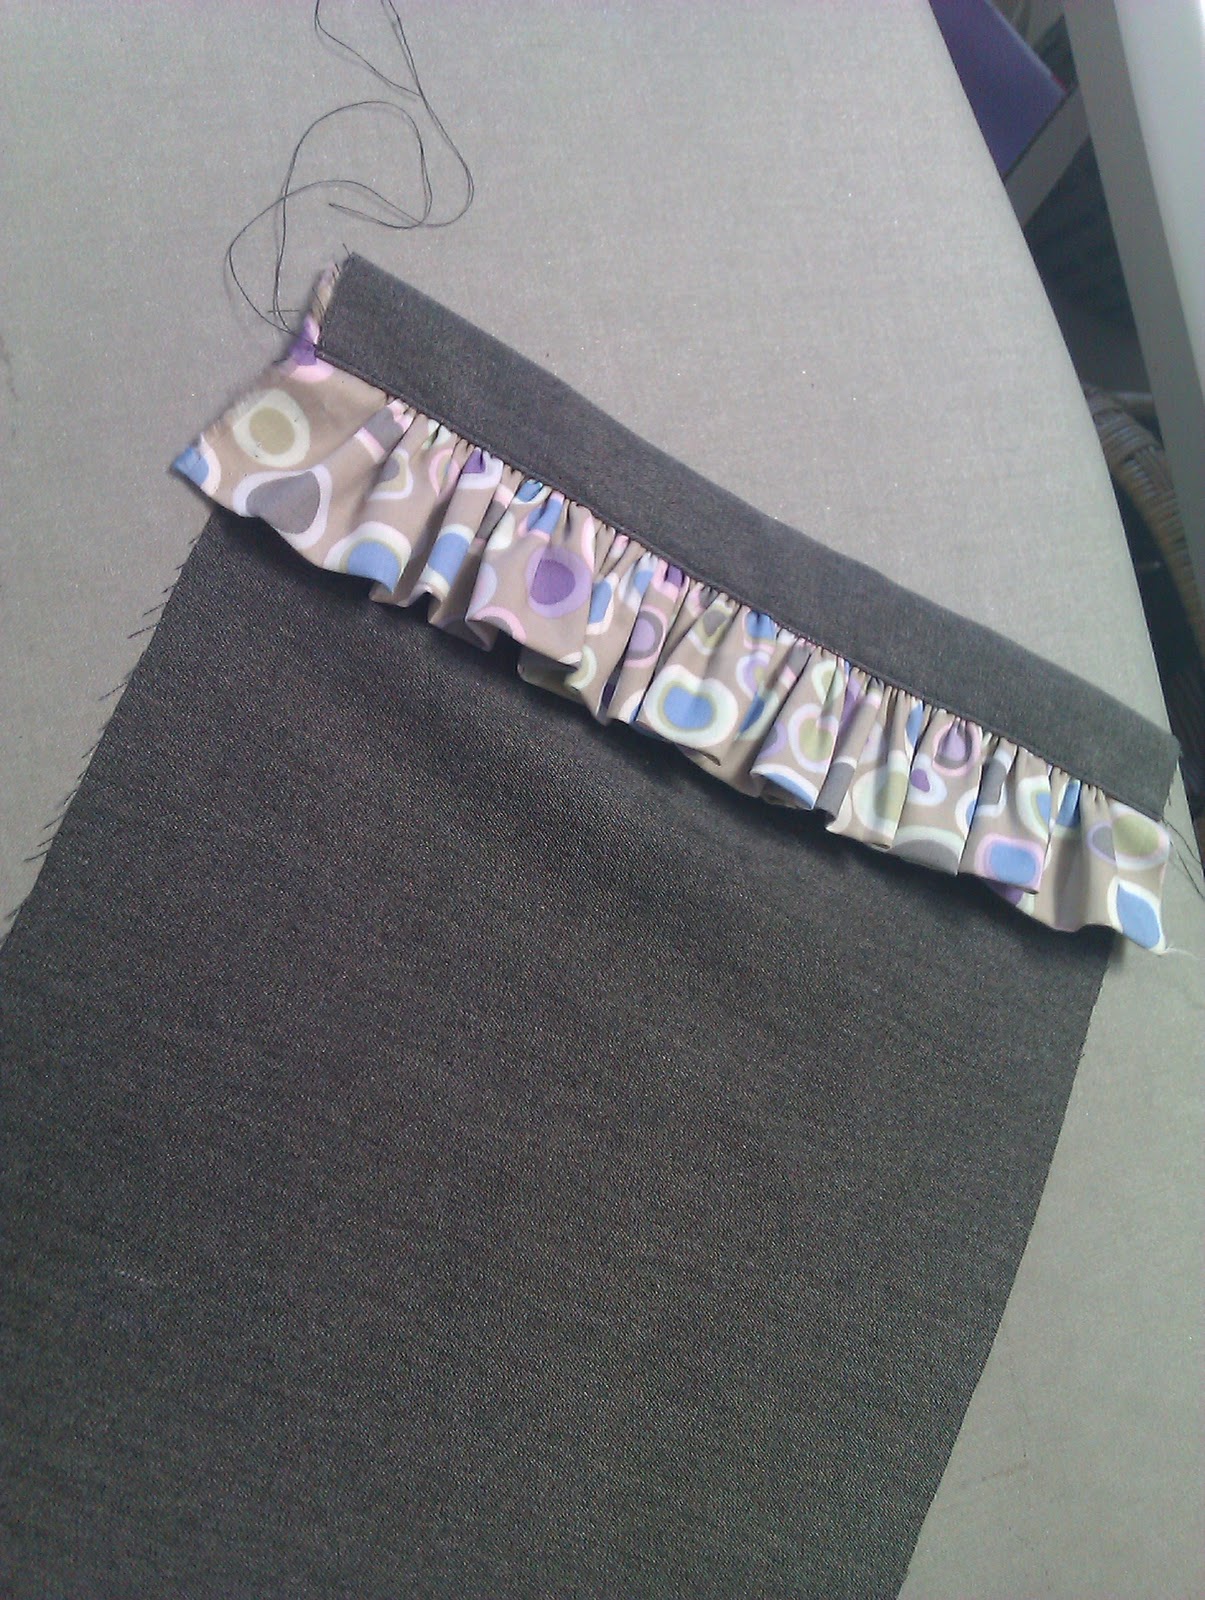
I did modify the basic pattern.  (I don't think it is possible for me to follow someone elses instructions to the letter!!)  I left out the darts at the base of the bag, lengthened the bag and strap sections and added a ruffled pocket to the outside of the bag.


As you see, I just added length using paper sections taped between cuts in the pattern.


I cut 2 of the main fabric.

Cut 2 of the patterned fabric.


Then on to making a pocket from some of the larger leftover scraps.


This was attached it to the main part of the bag.


Next the liner and the outside are stitched together.  Not all the way!!  Read Novita's instructions carefully and follow it to the letter!!


Clip inside curves.


Turn the bag right side out through one of the straps.  It is a bit tricky, but it does work.


Sew ends of straps together and then finish strap edges with top stitching throughout.
And voila!! a bag with cute ruffle detail.


Do you use a fabric bag?  Have you tried making your own?